
The use of architectural visualization and 3D rendering is unprecedented in many industries. 3D architectural rendering and modelling is used as a method to create photorealistic images and videos for multiple purposes. While the process of rendering is in itself pretty simple, its execution can be complicated for someone who isn’t necessarily trained and hence many individuals and companies who require architectural rendering turn to professional and experienced companies such as Estetic Vision who excel at providing architectural rendering services.
What Are The Steps Involved In 3D Architectural Rendering?
Architectural 3D rendering essentially involves four steps which include:
-
Determining camera angles
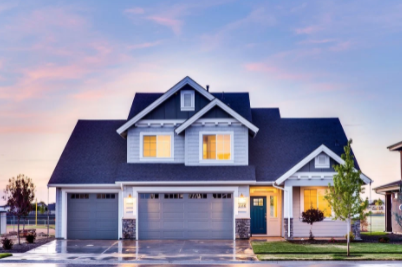
The very first step involved in architectural rendering is determining the camera angles to create the high quality image in question. Camera angles are an important aspect of architectural rendering and once chosen they cannot be changed because the entire process would have to be redone from scratch. Choosing a camera angle includes much more than choosing what area the picture will be centered on – rather, it sets the tone for your entire rendering.
Your camera angle would determine whether you are looking for a warm image, a relaxed one, or a cheery and happy one. Designers often choose to center their camera depending on the area that is central to their building, and it could be the neighbourhood, the landscape, or the building’s architecture, etc.
-
Creating 3D geometry
The very next step in this process is to create a grey render of the space in question. Grey 3D geometry models do not essentially have any colors, textures, materials or lighting – they are very basic and super generic architectural models. They set the base for everything else and are essentially used to show the client a 3D layout of the space that is to be designed.
The client may ask for certain aspects of the render in process to be changed. The requested changes are likely to be around the lines of changing camera angles for a better view, changing the structure’s elevation, increasing or decreasing the dimensions it is built around, etc.
-
Applying lighting and texture
Once the grey geometry is approved, the next step is to add in lighting, materials and textures. Some of these aspects must be already decided upto a certain extent – for instance, the lighting you add truly depends on the camera angles that were chosen by you in the first step. The camera angles also determine whether the shot is an exterior one or interior, and hence your materials and textures also change accordingly.
Interior shots are likely to include lighting by windows or lighting fixtures on the ceilings or lamps. Whereas, exterior shots are likely to be naturally lit and the landscape around it will feature shadows accordingly. Texture gives a realistic feel to your overall rendition and so the materials the artist chooses accordingly.
While different rendering companies may take a different approach to architectural rendering and 3D modelling, the basics of the process remain the same. Different 3D rendering companies may offer their services in a varying manner, but the end result for all such processes is often the same: a high quality rendered image that covers all aspects of a space.


